
Generally, Tenda AC1200 extenders are designed with Gigabit technology that can easily work with the optical routers. These come with two antennas and a compact appearance. Likewise, if you recently bought this networking device, Tenda AC1200 extender setup is a must to use it to its full potential.
Furthermore, to make users aware of the complete configuration procedure, we share this brief post with you. Additionally, you will walk through the four different methods to perform the Tenda AC1200 repeater configuration effortlessly. So, to get more explanation for the same, keep reading this post!
How to perform the Tenda AC1200 extender setup using multiple ways?
Moreover, it is necessary to have a stable internet connection to connect your Tenda repeater to the existing router’s network. Additionally, you can go ahead with the web address, Quick Setup, Tena wifi app, or the WPS options to configure the Tenda AC1200 repeater. Hence, walk through this piece of content to learn the detailed steps for each process:
Web Portal
- Firstly, connect your PC to the LAN port of the extender.
- After that, activate the preferred web browser and write in the re.tenda.cn web address in the browser bar.
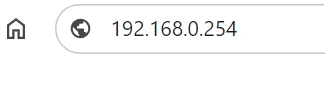
- Otherwise, you can opt for the 192.168.0.254 IP address instead of the web GUI.
- Next, enter the password to log in to your user account.
- If you are a new user, then create an account password first and confirm it.
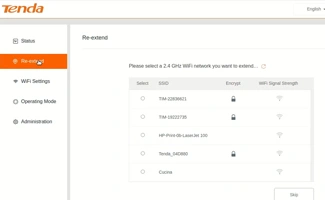
- After logging in, a list of the available networks is shown to you.
- Here, select the network that you want to extend and key in the password for it, and then click on Extend.
Configure the settings
- Further, you are prompted to give a new name to the Tenda extender network.
- Next, you are shown two options: Repeater and AP Mode.
- Hereon, choose the Repeater mode and go back to the dashboard.
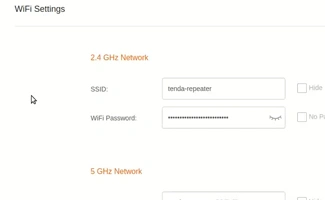
- Click on the WiFi Settings and modify the network name (SSID) and security key for the extender.
- Similarly, visit the Administration Settings to set a new Admin password for your Tenda repeater.
- Likewise, go back to the dashboard and click on the Operator; here, choose the AP Mode if you want to change it.
- Follow further instructions to configure the additional settings.
- At last, you are all set with the Tenda AC1200 extender setup.
Quick Setup Mode
- To begin with, plug in the range extender closer to the router within the same room.
- Next, visit the wifi settings of your smartphone and link it to the extender’s network, shown as _ext.
- After that, you are redirected to the Quick Setup Page to initiate the Tenda AC1200 extender setup.
- Further, create a login password first and then confirm it.
- Now, click on Next, and the extender will look for the nearby networks.
- Here, nearby internet connections are shown to you.
- From the list, choose your home connection and type the password for it.
- Now, click on Extend and wait until the signal LED on the repeater turns to Blue.
- The SSID and the password of the Tenda extender are the same as the router.
- So, to change them, visit WiFi Settings and edit the SSID & password fields.
- Hereon, write the strong network name and security key to secure your extender network.
- You can configure further settings by exploring and following the on-screen instructions.
- Finally, you learn how to setup Tenda AC1200 extender.
Tenda WiFi app
- Initially, check that you are using an updated version of the Tenda wifi app.
- Disconnect your smartphone from the existing network first.
- Now, reconnect it to the Tenda extender network, which shows as _ext.
- Afterward, access the admin account on the app using valid user details.
- For a fresh user, signing in or creating a new account is mandatory.
- After accessing the login interface, you will see the Tenda AC1200 extender setup dashboard.
- Here, the app will scan for the current networks.
- Additionally, a glossary of the internet connections is shown to you.
- Hereon. Select your existing router network and enter the security key for it.
- Now, click on Extend and wait until the repeater establishes the connection with the router.
- Again, visit the home dashboard of the extender and explore other settings.
- Follow the guidelines for additional settings and customize your Tenda networking device.
- At last, the Tenda AC1200 extender setup procedure finishes now.
WPS Button
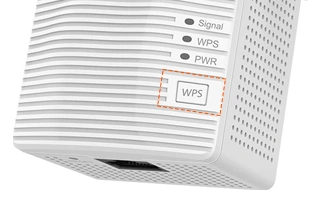
- Primarily, place your range booster within the same room where the router is already located.
- Now, seek the WPS button on the existing router and the extender.
- Afterward, press and hold the WPS knob on the router first and then on the repeater simultaneously within 2 minutes.
- Keep holding the button until you see a signal LED on the extender turn on.
- Now, release the buttons on both networking devices to finish the Tenda AC1200 extender setup.
- Lastly, the extender successfully established a connection with the router.
In the End
All things considered, this detailed post summarizes the necessary information for Tenda AC1200 extender setup. Additionally, you will find four methods here to configure your networking device to the existing router’s network. This will help to eliminate the dead zones, and you can enjoy seamless connectivity for surfing!